| Chris Hanson... Eric McCalla... |
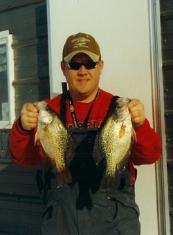
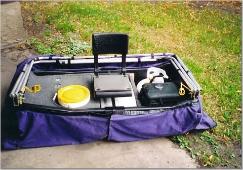
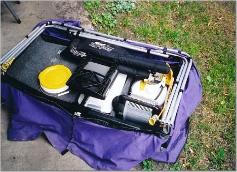
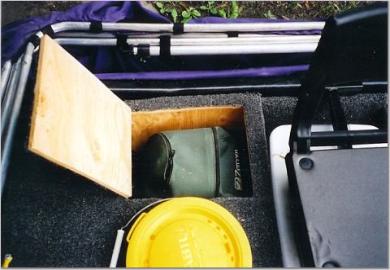
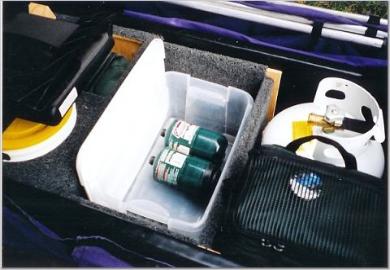
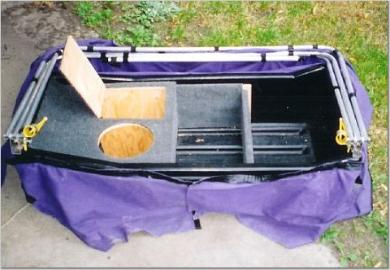
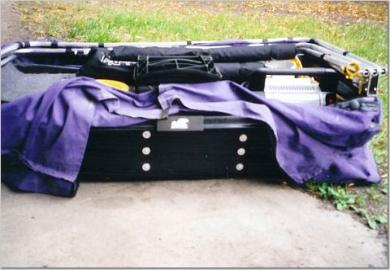
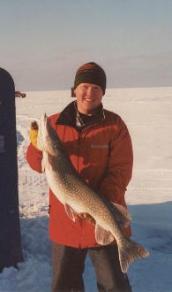
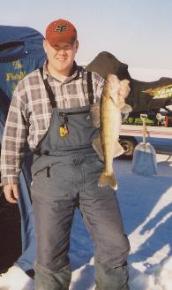
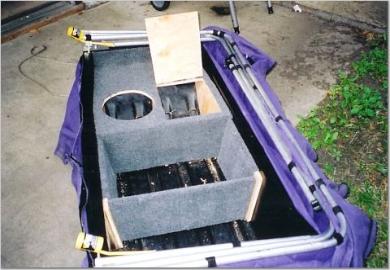
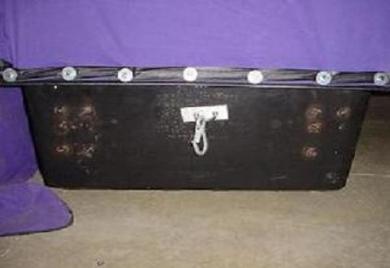
| By: Matt Johnson Featuring: Chris Hanson* and Eric McCalla** Portable fish houses come in all shapes and sizes, anywhere from small one-man huts to large tent-style sleepers. When in hot pursuit for that trophy fish during the winter months, we want something that is mobile and effective, and nowadays most portables are designed for just that purpose. But there are things that can be changed, or fine-tuned to make things easier out on the ice. Modifying you fish house can help solve some of those problems, or it might just be something to do over the summer months or in anticipation for the upcoming winter. Chris Hanson, an avid ice angler, has mastered the art of portable fish house modification. Chris started with an Otter Den and ended up with a masterpiece... "This was one of my small summer projects. The idea was to create something that would better organize my gear inside my Otter sled. This particular sled happens to be the Den sized ice house from Otter. The general idea and design principles could be effectively applied to the bigger sized sleds as well as other manufacturer's fish houses." "The basic idea was to try to keep my ice fishing gear in place while pulling the Otter behind my snowmobile. I like to use the little Frabill minnow buckets because you are more durable than a regular foam bucket. Now it has a place where it won't get broken and my minnows are always right where I need them. Protecting my fish locater was also important. Now I have a little compartment with a hinged door on it to put the locater in. Underneath my seat is a tupperware type container for various items. I like to use it as a place to keep the fish I'm taking home for supper. My propane tank and tackle box go in the back end of the sled. The tank is an 11lb which is perfect for this small sled. Notice between the first two pictures that I can either put my tacklebox (which is a soft side from Cabelas) or my buddy heater in the same location in the sled. Little Dipper ice fishing scoop fits in the back perfectly. My rods lay across the back of the sled. Right now I keep them in Ready Rig cases but a Stone Legacy Revolution will be replacing them this winter. According to the sizes on Stone Legacy's website, it'll fit perfectly in this location." "Two things that won't go in the sled are my auger and a lantern. The auger takes a ride on a luggage rack on my sled. The lantern I'm still coming up with ideas for." Next couple photos show a little more detail of the compartment for the depthfinder and the tupperware container under the seat. "Construction of the 'insert' is pretty simple. I just used 1/2" plywood and screwed it together with a little construction adhesive for good measure. I then carpeted most of the insert with marine carpeting I picked up at Cabelas. $4 for this nice remnant during their tent sale. I then just screwed through the sides of the sled to attach the 'insert' to the Otter Sled. The trap door is fastened with a couple small hinges and I still have to add a small handle or maybe even a latch to keep the door shut." "I spent many nights cutting & taping together cardboard templates to get the design just right. Believe me when I say it has come a long way! My early designs were horrible compared to what the finished product is like." "You may be wondering why the plywood sides of the 'insert' stopped short of the end of the sled. Basically it was for room. I couldn't fit my tacklebox & the propane tank next to each other if I had extended the plywood sides. Why the big tacklebox?? Its pretty much another compartment. I put lunch in there, couple cans of pop, 2 way radio, tackle, pliers, headlamp, lake maps, hand towel and a bunch of other stuff." "I'm basically putting this up here to help others with ideas. I have no plans, no measurements, no templates or anything that would really help in duplicating this 'insert'. I designed this to fit the way I fish and it may not be perfect for everybody or their gear but it works pretty darn good for me. I should be at most of the I.C.E. Series events this year if anybody wants a closer look." As you can see, Chris's portable is designed for mobility and efficiency out on the ice. Now, let's take a look at another modified portable... Eric McCalla also spends a lot of time on the ice, and you will soon see why. Eric has also mastered the art of modifying a portable. Here's Eric's story... "I bought an Otter fish house a few years ago and was immediately putting it together so I could take it out on the ice. I bought the Hyfax runners, towing hitch, travel cover…pretty much the whole works. After my first trip on the ice, I was very pleased with the house, but it didn’t take long until I was convinced I could make the house better. I could make changes so I would make the house more comfortable. I could make changes that could make me a better fisherman. I could make changes just because I could. And with each change I made to the house, the ensuing trip I used it were all the more enjoyable. The following article describes the metamorphosis my Otter Magnum Lodge has undergone and what I have planned for it in the future." "The first modification to the Otter sled was pretty standard and I got the idea from seeing it on many other sleds. It simply consists of placing a U-bolt on the rear of the sled so other sleds can be hitched to the back. This is easy to do and works nice on the lake when 2 or 3 sleds are pulled out with a single 4-wheeler or snowmobile. For my sled, I added a ¼” aluminum strip on the inside and outside of the sled where the U-bolt is attached for support." "My next modification was to create a seating system. There are numerous seats and benches that can be bought at the store, but none of these satisfied my requirements. I don’t own a permanent ice shack, and probably won’t for a long, long time, so the seat design had to allow for some sort of sleeping arrangement too. I wanted the seats to be adjustable in the front-to-back range of motion along with being able to swivel. The seats would also need to be able to be removed. What I came up with is mounting a pair of 2x4’s for each seat widthwise on the sled. These are used a track for the seats. I mounted a standard swivel plate onto my seat and mounted a short length of 2x4 to the swivel with 2 long carriage bolts. To finish off the seat, I also mounted a strip of aluminum and wing nut on each carriage bolt. And to make sure the wing nut wouldn’t come off of the carriage bolt, I took a hammer to the end of the carriage bolt." "The third modification was to build a floor for the house. When I sleep in my portable, I feel that a floor is a must. I also like the floor for when I fish out of a spear hole because I like kneeling next to the hole and a floor is better than snow or ice. When I do use the floor, it does require more work to move and fish another spot, but it’s peanuts compared to cutting out a new spear hole. The floor is split into 3 sections and 3 hinges connect each to one another. When I’m angling through auger holes, I’ll have all 3 section of the floor folded out. When I have a spear hole cut out, I’ll only fold out 2 section of the floor." "The next modification was to fix the way the canvas was attached to the sled. I bought my Otter before the new Trim- Lock System, so I was stuck with those plastic pushpins. It didn't take long for me to have one of them pull out and another pull through the canvas. I used ¼” bolts, locking nuts, washers and some 5/16” washers to attach the canvas to the sled." "My fifth modification was by far the most time consuming. Like some of the permanent shacks, I decided to wire my Otter sled for 12V DC power. My main purpose was to wire the house for a lighting solution. In the end, everything turned out well, but there were few speed bumps along the way that I’ll point out." "The first thing I did was built the control box and battery stand. The control box is where all of the switches, fuses, and the lighter plug are housed. I chose to build the box out of a plastic cutting board because of the durability it offers. All of the components attached to the control box are flush-mount type and are held in place with a good 2-part epoxy. I also used the epoxy to seal the joints of the box, but it is by no means waterproof. There are three switches that control the front, top, and rear, lights as well as switch for the lighter plug and a switch for an extra power source. I used some aluminum and scrap wood to build the batter stand. I also attached a Velcro strap to the sled to hold the battery in place while the sled is being pulled." "The next thing on my list was to create the power outlet boxes. These were also made out of the plastic cutting board and were sealed with the 2-part epoxy. There are 3 outlets attached to the extension poles throughout the house. One is in the front of the house, another at the top of the house, and the final is at the rear of the house. Each of the outlets has a standard 2.5mm DC jack." "The final step in wiring the house was to run the wire from the power outlets to the control box. This is where things got a little hairy! I chose a 2-conductor plastic shielded cable to do the wiring. I soldered one end of the cable to an outlet and threaded the cable from where the outlet would be mounted to the bottom of the poles where they attach to the Otter sled. This is where I discovered my first pitfall. There is a pin that locks the inner tube to the outer tube that fills up most of the space in a section of the inner tube. Fortunately, there was just enough room to coax the cable past the pin. I suspect the new square tube used on the newer Otter houses won’t be as much a problem, but I haven’t looked at the poles yet. The last pitfall of running the wires came when I needed to take the wire from the inside of the tubes to the control box. I discovered that I couldn’t run the wire out the bottom of the tube because there just wasn’t enough room and the wire wouldn’t slide in and out easily. Since the inner poles slide in and out during assembly/disassembly, the wire would need to move easily in and out of the tubes. What I ended up doing was drilling a hole in the outer tube and a ¼”x4” slit at the bottom of the inner tube. I had to cut the slit in the inner tube far enough back so it would reach the hole drilled in the outer tube when the poles were fully collapsed. Once all this was done, I sanded all the holes and cuts and the wire slides in and out seamlessly." "I choose to use LED’s for the lights because they don’t draw too much power and are still fairly bright. I took the easy way out on this one and bought LED tubes that were already assembled. I have two 12” tubes, two 8” tubes and a single 18” tube. These give off more than enough light to illuminate the house. These tubes were fairly expensive, but if you have a solder iron and the time, you could come up with your own LED tubes for a fraction of the cost. As a note, if I were to paint my floor white the light would be much brighter…at least that was my experience when using the tubes in a friend’s white-floored house." "The next modification was for rod storage. I have a couple of the Ready Rig bags, but I wanted a storage system for when I was fishing in the house. There’s nothing more frustrating than trying to dig a rod out of the Ready Rig, especially when a couple rods are in a bag, when the Walleyes are on a feeding binge. I used some scrap wood I had laying around, and bought some aluminum to make the mounting brackets for the rod holders. These rod holders were a little more expensive than others, but I really wanted something that would hold my rods snug while the sled is being pulled. I place the front rod holder under the seat and rear rod holder on the back of the sled. The only drawback of the rod holders is that the rod length is limited to the width of the sled. I don’t like fishing with a long ice rod (sight fishing through a spear hole a lot), so I’m not too concerned that it’ll become an issue." "Some of the future modifications I plan to complete before the ’ 04 – ’05 ice season include a tip-up storage system like the one already done for the rods, a quick access clip or tube for very quick rod access, and a storage insert (similar to that of Chris Hanson’s Otter) for storing the LED light tubes, flasher, and other equipment." "I originally wired the house to have five 12V DC jacks and a single 7.2V DC jack. In my searches for a DC-DC buck converter, I came across a unit that could step down 12 V DC power in 1.5V increments. So, what I now have is a DC jack that I can power with 1.5V, 3V, 4.5V, 6V, 7.5V, or 9V. This opens up a lot of opportunities for taking your gear that runs off of batteries and powering them through the DC jack. Some of the things I’ve thought of include radios and Motorola Walkabouts. I still have the lighter plug for the 12V items like cell phones. There are also some portable solar arrays that fold up nicely and could be used to charge the battery via the lighter plug!" "My original reason for having a 7.2V power source is for what I believe to be the most exciting modification I’ll do on the house. I want to mount a digital camcorder on the frame of the house and film some of my fishing trips. Since I like to sight fish through spear holes, I intend to mount the camera above the spear hole and film the fishing action that way. I thought it would be easier to connect the camcorder to a larger power supply rather than change batteries every couple of hours. My goal is to be able to film and fish by myself at the same time. I still want to remain an effective fisherman, so I’ll have to come up with a design/system that requires minimal attention to record the action." "I hope the ideas presented in this article have given you an idea on how you can make your life a little easier and a little more enjoyable on the ice. Just imagine it, no more broken mantles, no more tangled lines in 5-gallon buckets." Modifying a portable fish house can be both a lot of fun and a lot of work, but when all is said and done you will have a unique, fine-tuned, fish catching machine! *Chris Hanson - chris_r_hanson@hotmail.com **Eric McCalla - ejmccalla@yahoo.com |

| Matt Johnson Outdoors Modifying Your Portable |
| Matt Johnson Outdoors |
| I put a clasp on the U-bolt to make it easier to hook up other sleds with tow hitches. Looks like I didn’t put too much effort into making sure the holes in the aluminum were drilled properly! |
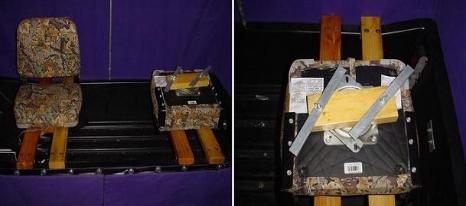
| In order to sleep in the house, I can take out the seats and lay a piece of plywood over the 2x4 seat tracks. Because the outside lip of the sled is higher in the front of the sled as opposed to where the seat tracks are mounted I used 2x4’s to raise the sleeping plywood so it was more flush with the front of the house. |
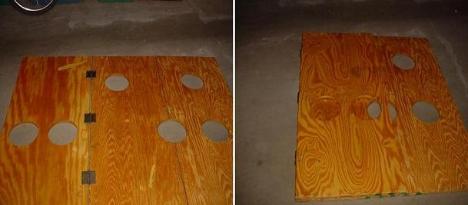
| The floor in the picture is laid out as if you were sitting in the house facing the door. Of the two holes cut out nearest the angler, one hole is for jigging out of and the other hole if for a flasher. The two holes furthest from the angler are for deadsticks or bobber rods. |
| It’s hard to see in the picture, but there is a ¼” washer and then a 5/16” washer on the front side of the bolt. On the rear, there is another ¼” washer and locking nut. |
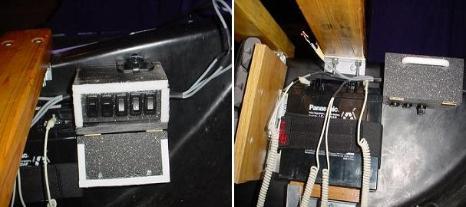
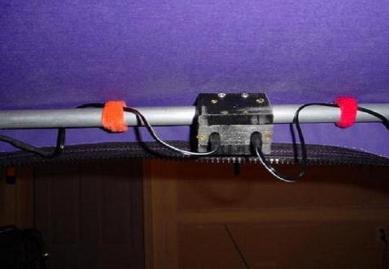
| The picture on the left shows the control box with the 5 toggle switches and the lighter plug. I have the box mounted next to seat tracks at the front of the house. The picture on the right shows the battery sitting on the stand and strapped in. You can also see the panel-mount fuse holders on the bottom of the control box. The bare wire is going to be hooked up to a DC-DC buck converter and used to obtain multiple DC voltages. |
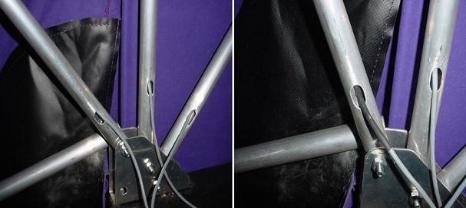
| The picture on the left shows the wires coming out of the tubes when the house is assembled. The picture on the right shows the wires coming out of the left tube when the house is being disassembled. You can see that I added some shrink tubing to help protect the wire from the edges of the poles. If you look close enough at the left tube, you can see the part of the slit that was cut out of the inner tube. |
| This is a picture of the front power outlet. Not shown is the sock-like cover for the outlet. The cover is used to keep snow and ice out of the DC jacks. With the square tubing of the newer Otter houses, I would think that this whole outlet could be replaced with panel-mounted DC jacks, but I haven’t looked into it. |
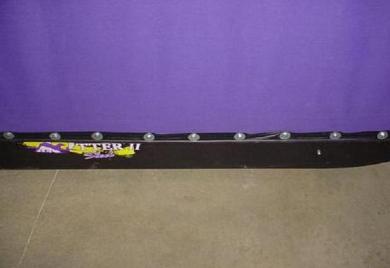
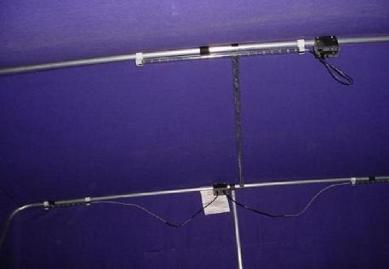
| This picture shows the top light and the 2 rear lights. Two more lights are in the front of the house. The top outlet has 12V DC jack (the one the light is plugged into) and the other jack is wired to the variable power source. |
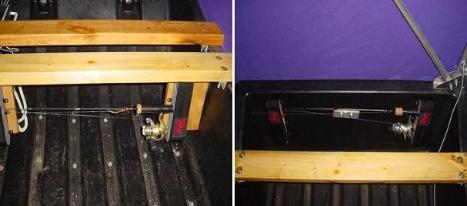
| The picture on the left is of the rod holder at the front of the house and the picture on the right is of the rod holder at the back of the house. Each rod holder can hold up to 3 rods. |
| |
| |
| |
| |
| |
| |
| |
| |
| |
| |
| |
| |